Atomstack A5 Laser on macOS Catalina and LightBurn
Of all the many, mnay toys on my ’to buy’ list, a laser engraver definitely wasn’t one of them. I’ve had mixed success with 3d printing in the past, and whilst I’ve often thought a CNC could be fun, despite the appeal of burning things with fire and the occasional Austin Powers reference to frickin’ laser beams, engraving with lasers has never been high up my priority list.
So when an Atomstack A5 randomly showed up on Facebook marketplace, the inevitable happened. The seller had actually made a nice little side hustle doing personalised gifts and such like so there was maybe even a vague chance of recouping the cost and turning it in to something. Haha, yeah right, but hey whatever helps to justify it. With my motto1 of ‘why let being sensible stand in the way of an opportunity to buy new dangerous tools’ the purchase was made and a rather spangly new frickin’ laser beam made its way in to my possession.
Atomstack A5
It’s a nice unit with I think a 20w laser. It didn’t look to be too hard to put together but I was saved the hassle of assembling it. And they’d even put it in a nice big (and awkward and heavy… see later) 18mm MDF enclosure.

And it came with a license to LightBurn which is a cross-platform tool for laser engravers - i.e. it had a macOS client available. I had a spare Macbook Pro “lying around” so it seemed like a straight-forward process of installing the software on the Mac, attach the USB cable, power up the Atomstack and then just start lasering everything!
Right?
Bugger
Wrong. I did the above and the Lightburn Device Discovery Wizard just point-blank refused to find the laser…
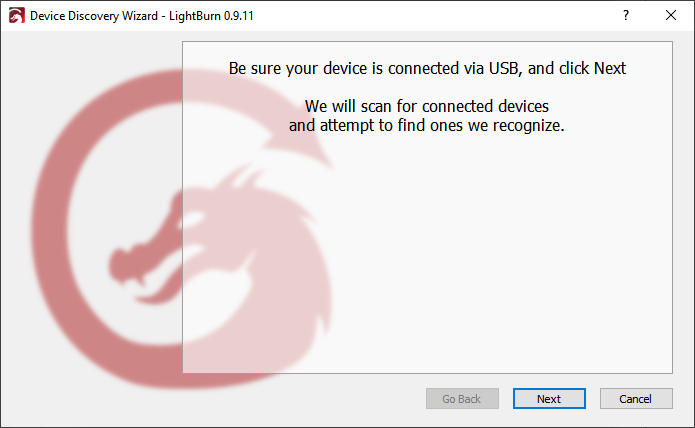
The laser head made a little ’thunk’ so it definitely seemed like it should work… but it just wasn’t. I spent some time reading, researching, finding drivers, turning off and on again… a lot - and no amount of fernagling would persuade the things to speak to each other.
So this great giant heavy box sat in my garage literally in the way of everything for pretty much a year whilst other things took priority… namely building a workshop2 in my garden. (I’ll write about that at some point.)
Let’s do this
But this past weekend I finally got to a point where I had some time to get back to it and became determined to get this thing working.
Desperately trying to remember what I had tried all that time ago, I repeated the obvious steps with the same results. Fundamentally everything was hooked up but Lightburn was refusing to see the laser. You can add the laser manually (setting a zillion parameters) but this didn’t feel satisfactory (and I wanted to at least get to the accepted defaults) so as to not introduce any additional uncertainty in to what I was doing.
I started to fear that either the laser itself was faulty or it just wasn’t possible to run it on this combination of macOS / hardware / etc.
I then disappeared down a rabbit hole where I thought it was possibly a macOS Catalina issue - more recent versions of macOS have introduced more stringent security requirements - particularly around third party apps / devices / drivers. So next plan of attack was to try and downgrade the Macbook Pro to OSX High Sierra to see if that had any more success.
Rabbit hole
And that was a typically unfulfilling endeavour. Whilst creating a bootable USB installation drive for macOS / OSX is well documented and relatively straight-forward, you do unfortunately hit some annoying road blocks along the way. The first is that macOS / OSX blocks you from creating a bootable USB for a version of macOS that the Mac you’re using doesn’t support! So my current M1-based macOS Ventura couldn’t create a High Sierra drive. Gah.
The way around this was to use the Macbook Pro itself (on Catalina) to create the bootable drive. You need the install media (obviously) but I’ve kept a cache of these over the years for just this eventuality.
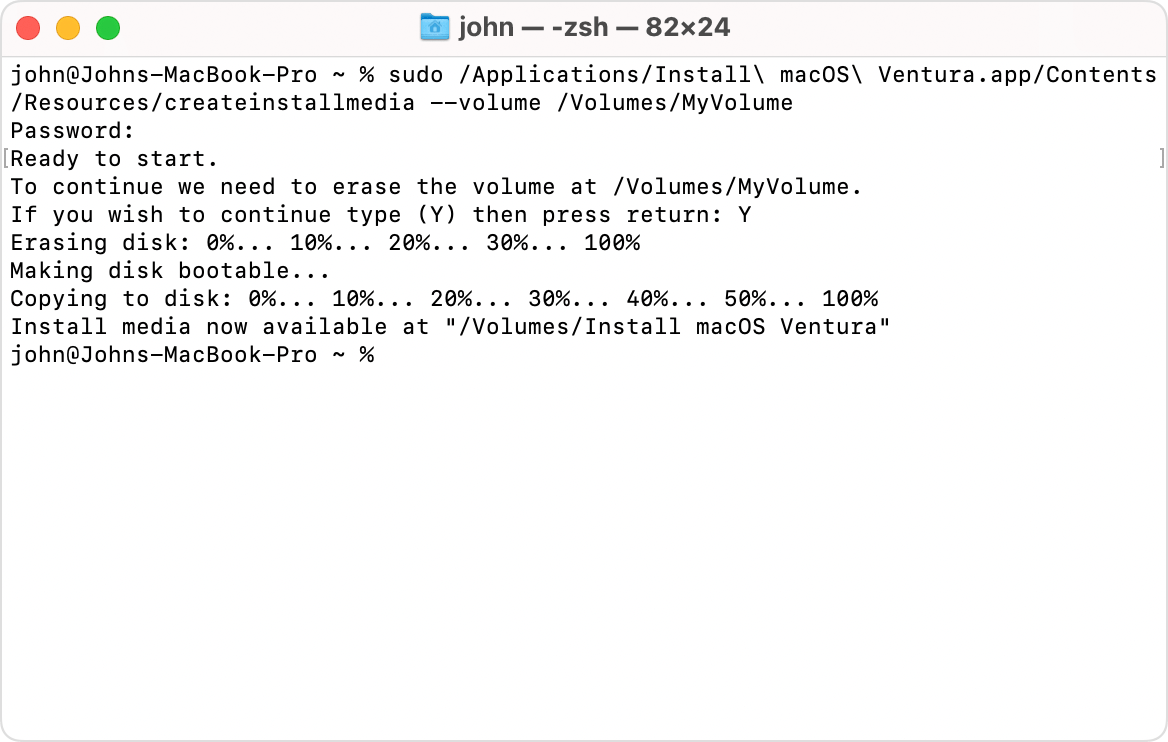
With an at least 16gb USB drive plugged in, where that drivs is called ‘USB’, you can create the install media using:
sudo /path/to/install/media/Install\ OSX\High\ Sierra/Contents/Resources/createinstallmedia --volume /Volumes/USB
You’ll jump through a few hoops but it will eventually create the disk for you.
You then have a few options on how to use this, ranging from booting in to macOS on the device, going to disk utility and telling it to use your new USB stick as the startup disk and then reboot… or going for the slightly more gungho approach of booting to recovery mode, going to disk utility there, deleting your existing volumes, and then rebooting and hoping it hits on your USB drive on reboot. (You can force this by using CMD + R) during boot.
However, you will very likely hit an issue (depending on which version of macOS / OSX) you’re trying to go to, when you hit an issue along the lines of:
This copy of the Install macOS application is damaged and can't be used to install macOS
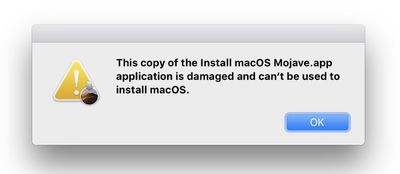
There is actually nothing wrong with the installer at all. The issue is that the certificate that was used to create the installer has expired. The alleged fix for this is to download a new set of install media - and if you can do that, then go for it. But I couldn’t find a version of High Sierra to download, but, method 2 from this page did work for me:
- Right click on the installer and click “Show Package Contents”.
- Navigate in to “Contents” then “SharedSupport”
- Click on the folder named “SharedSupport”.
- Delete the file named “InstallInfo.plist”.
The installer should now be fine.
Except it’s not
So with the above fix in place the installer got past the initial message… but it still wouldn’t install. It got so far in and then complained that the ‘recovery server’ could not be contacted:
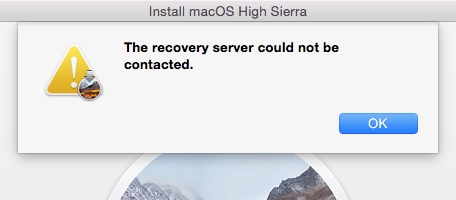
And I could not find a way around this. Maybe it’s a temporary issue… but my suspicion is that it is now just not possible to reinstall High Sierra. It’s just too old. (Which is super annoying because I do have the full sized installer… I don’t need any recovery media!)
Now what?
Last ditch
I only have Mac hardware and so whilst I could provision a VMWare Fusion based Windows or Linux virtual machine, I really wanted to avoid that if at all possible and so for reasons that I cannot recall, I had another bash at macOS Catalina3. And I somehow got it working.
I repeated the above to create new install media for Catalina and perform a clean install. From there, I installed the CH340 v1.5 driver pack and then Lightburn v.1.2.01. Connected it all up, turned on the laser, and tried the device discovery wizard.
And would you believe it!? Yep - it still didn’t work.
From there I installed the CH34xVCPDriver package (which seems to be v1.7 of the CH34x… and can be found at WCH) and then Lightburn randomly offered me an upgrade to v1.4.01 which I accepted.
Magic
It still didn’t work. And then I turned it off and on again, and restarted this, and turned that off and on. Rebooted it all and reconnected it all.
And then… it just started working - the device discovery wizard found the laser! What?!
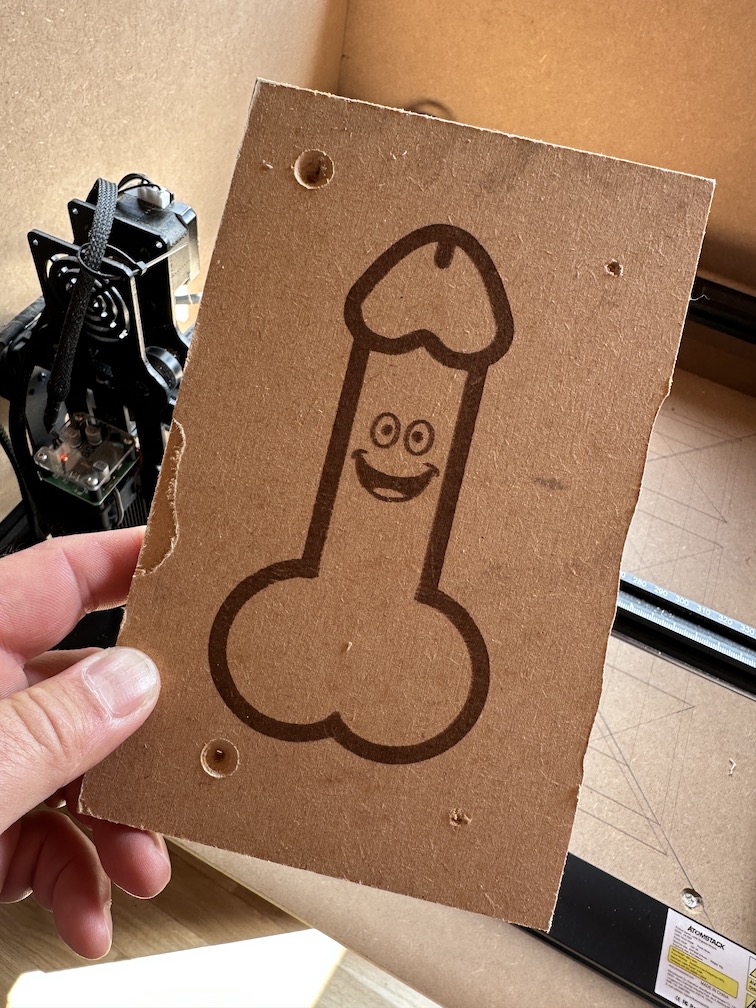
A quick rummage in my scrap bin, a fiddle with the software, and I was merrily engraving my first… thing.
Tricky
If I had to do it again, I think the following steps are probably what got it working:
- Install CH34x v1.7 driver package
- This will trigger the ‘unidentified device driver’ warning in Security & Privacy so MAKE SURE that you go and allow this to run as per here
- Reboot the Mac
- Install Lightburn 1.14.01
- Reboot the Mac
- Turn on the laser
- Plug in the USB to the Mac
- Start Lightburn
- Run the Device Discovery Wizard
You may very well need to repeat this a lot. The trick here seems to be the driver that the CH34x package installs. In terminal, you can do:
cd /dev
ls tty.wch*
and this should show something like
tty.wchusbserial12345
where 12345 is the port that has been assigned, which you should then see in the Devices area of lightburn:
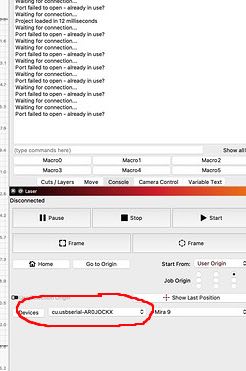
If in the console view you see the message about ‘port failed to open - already in use?’ then the trick seems to be just close LightBurn, wait a min or so and then restart it. If the tty.wch* driver doesn’t show up in the devices area, then reboot the Mac. Getting connected to the device does seem a bit flaky but most things seem to be resolved with a reboot.
eye surgery?
But once it’s attached it’s been a lot of fun randomly lasering things!
So what next, other than actually learning how to do all this properly? Well it definitely needs a lid and an exhaust port and some means of venting the fumes out of my shed because it can get pretty stinky even from the small amount I’ve done so far. I also need to get my head around materials, focusing the laser and the connection between laser speed and power output. (I’ve already found some test templates which should do this. Burning them… did not go well!) I’m also excited about the prospect of using it to cut things… I need some more suitable materials though.