Converting a Bosch GKS 18V-57 to a GKS-18V-57 G
The G… is important. Very important, in fact.
Why might you want to do this? Well, the ‘G’ indicates that the saw is compatible with the Bosch FSN guide rail system. G for ‘guide’… maybe.
Let’s back up. Over the last 2-3 years I’ve been steadily replacing my corded power tools with cordless. I have been a longtime Bosch user - Bosch Pro to be precise - for no good reason other than that was where I started, and I’ve never had any problems. I have a Bosch Pro drill that I’ve had for at least 20 years and other than it being the old style battery that now won’t really hold a charge, it’s still going strong. So a few years ago, I stumbled in to the Bosch 18v Lithium system and have been updating ever since.
(In fact my only grumble is that the Bosch ‘green’ has an 18v battery system that is NOT compatible with the Bosch ‘blue’ 18v battery system. I found this out the hard way when ordering a hedge cutter. Grumble grumble.)
So in that time, I have bought new 18v drill(s), grinder(s), jigsaw(s), multi-tool (as well as a mixture of 12v equivalents), a sander and… probably more things. The main thing missing from all this cordless power was a circular saw. Having a cord on a circular saw is probably the most inconvenient tool to have a cord on. How many times have you cut the length of a full sheet of ply to get snagged on the cord? AT least some times, I’ll bet.
I’ve been setting price watches on these tools and when they pop up, on offer or similar, jumping for them. This was true of the FSN rail kit - which was entirely useless to me until I was able to a compatible saw.
So when the GKS-18V-57 G popped up on offer, I didn’t hesitate. I knew it was the one. A cordless, 18v, FSN-compatible circular saw was a done deal. It was ordered. It arrived. It went on the shelf until I needed it.
Some time later - I forget exactly how long - but later, nevertheless - the moment of truth came. I was away from my garage, I needed to cut some marine ply and it needed to be straight. Armed with the shiny new saw and the shiny new rails, I set to work - only couldn’t for the life of me figure out how to attach the bastard saw to the bastard rail. It just didn’t work. Without time to figure it out, I had to measure and then clamp the rail and then just use it as a *really* expensive straight-edge. The job got done - but it was not satisfactory.
What had gone wrong, I wondered. I knew the saw was compatible, I knew the rail was right. There was no assembly required. What was happening? I checked again. Yep, it was the Bosch GKS 18v-57 and we know that’s compatible! Right?
Wrong. There was a ‘G’ missing from the end of the model number and according to this list, that is all important.
So what had happened? Well, I now realise. At our favourite rainforest-themed online store, they offer two versions of the saw - one in an L-Boxx and one in a carton.
Exhibit A:
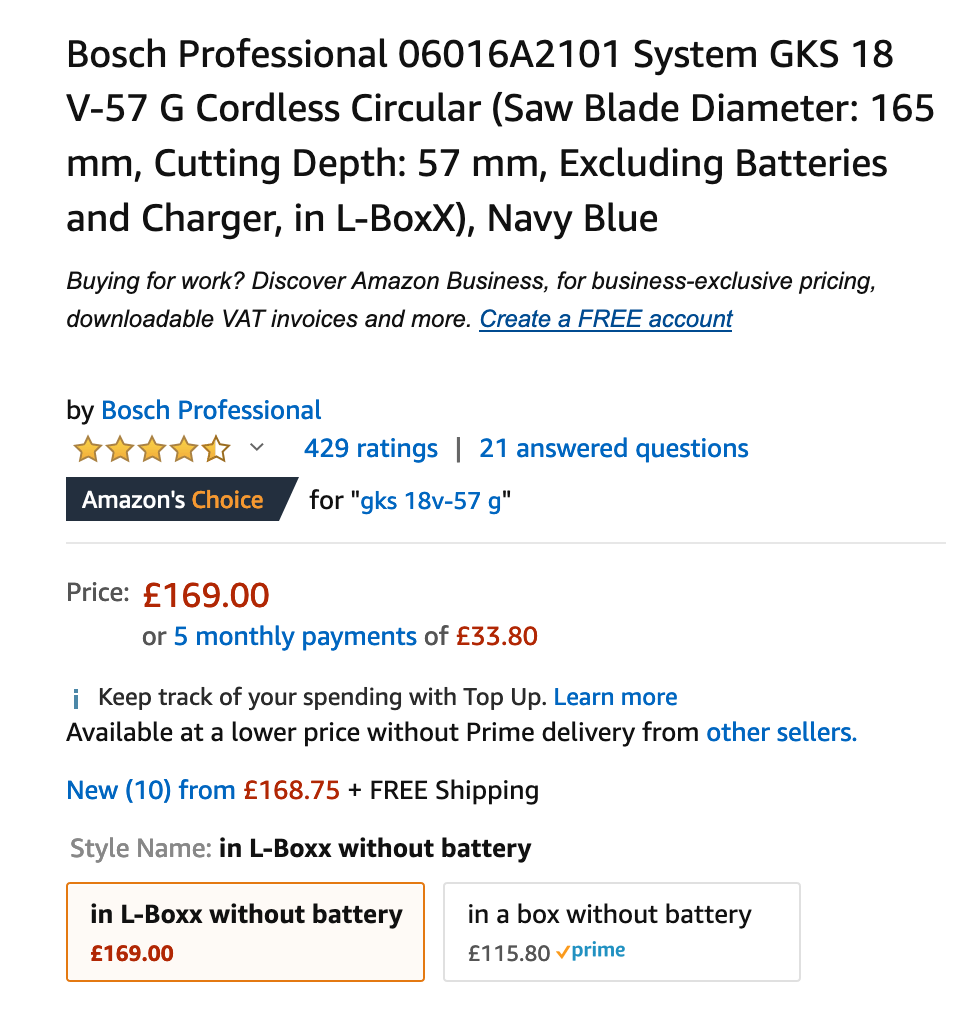
This is the puppy you need. However, I don’t want anymore L-Boxx, so I merrily swapped to the ‘in a box without battery’ model, but…
Exhibit B:
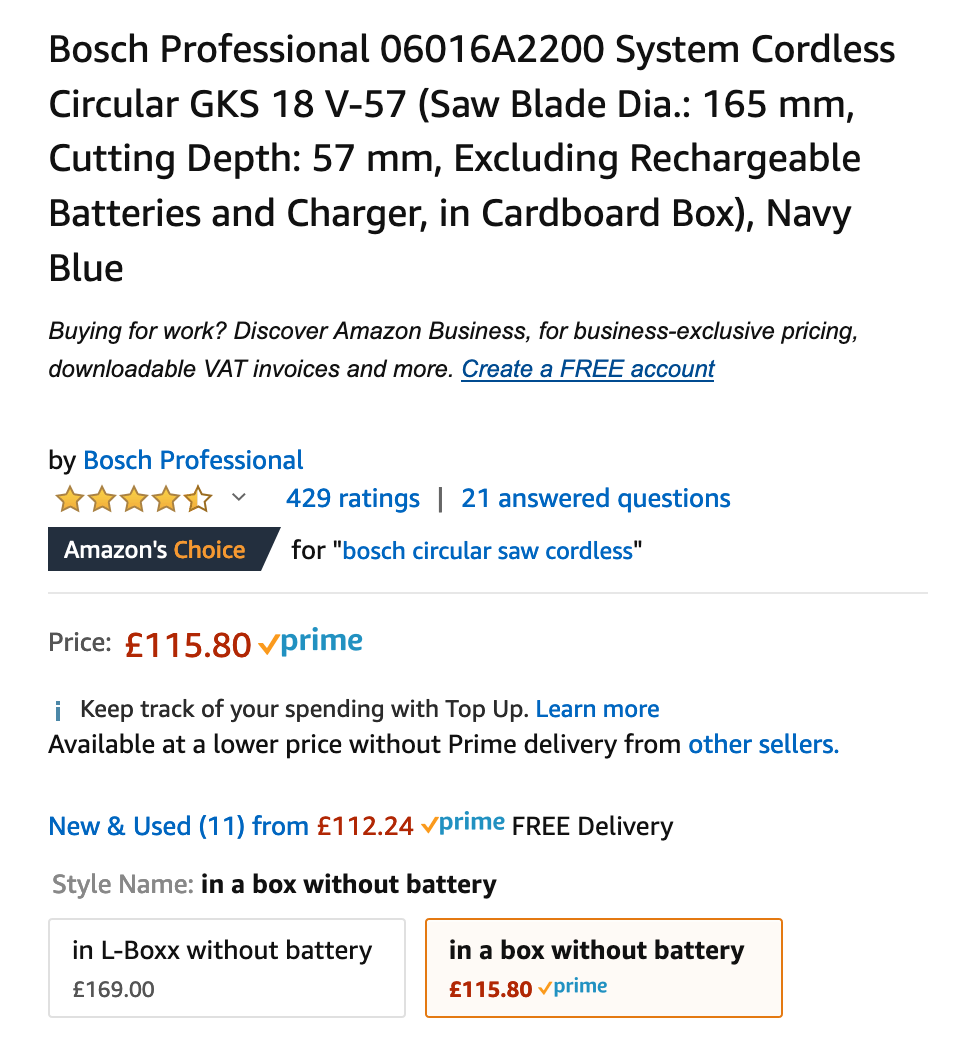
Notice how the model has mysteriously lost the ‘G’ suffix and indeed, you now receive the non-FSN compatible saw.
I don’t know who you would even begin to ‘blame’ in this… so to use the expression du jour… it is what it is.
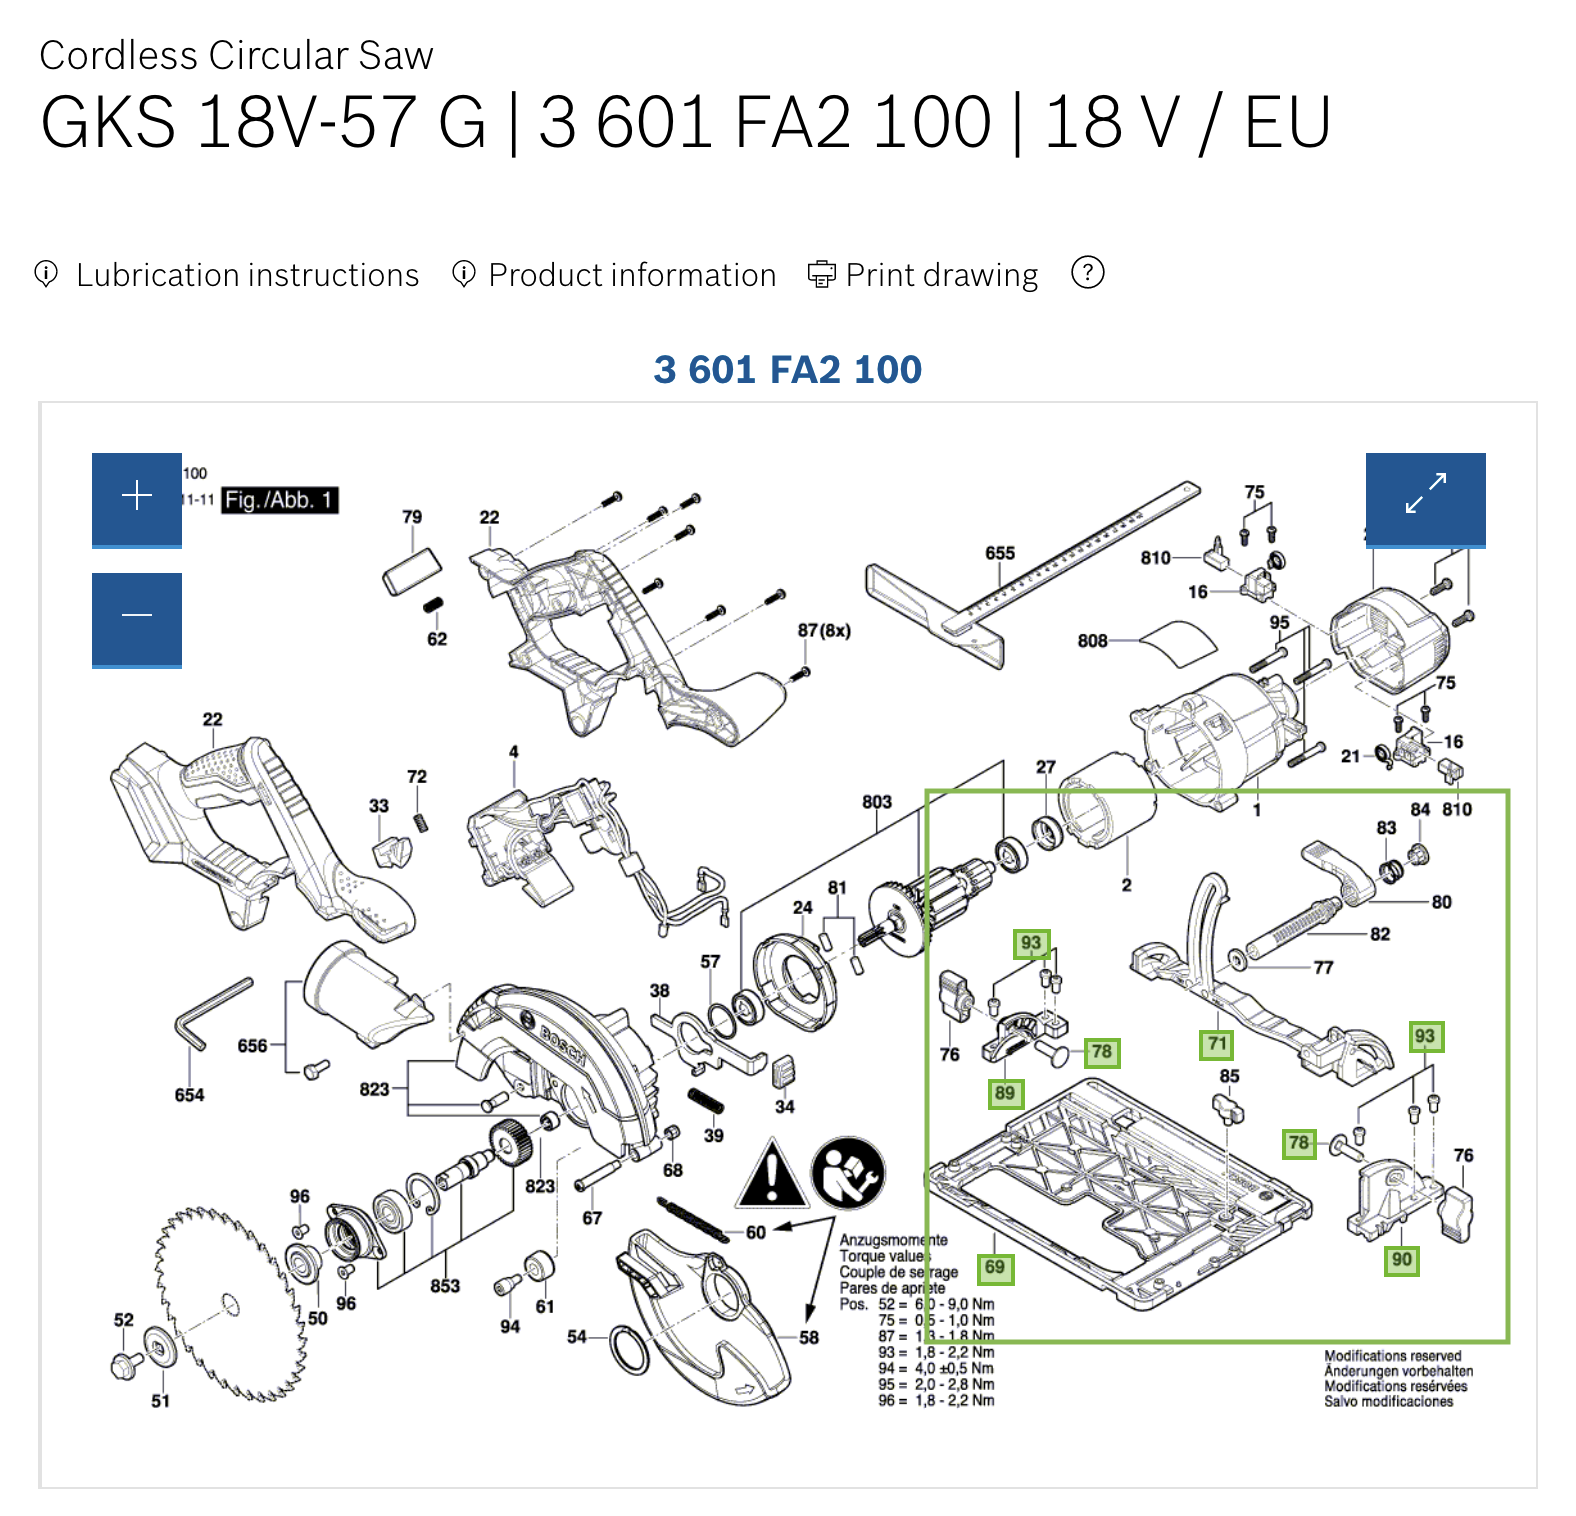
I stumbled across this post on the Bosch forum which discussed the exact problem and someone had located the diagrams for both versions of the saw: the G and non-G. I studied both diagrams and determined that the only difference (or rather, the thing that enabled the saw to be used on the rail) was the base; and so therefore figured it must be possible to order the parts for the base and retrofit them on to my saw. So that’s what I did.
I worked out a parts list from the Bosch spare part search. In the end, I opted to buy absolutely everything to be (a) ensure I would have everything I needed and (b) would have a complete non-G baseplate after… for some reason. See later for why this was silly.
The parts arrived from Bosch; neatly organised in bags and whatnot. Using only the diagram as a guide, it was fairly trivial to figure out how it would all come together. By far the trickiest bit was figuring out how the old base attached to the body of the saw (part 60 on the old and 67/68 on the new.) It’s a sort of a pressure fit split pin type thing - in the end I whacked it out with a hammer - and then whacked it back in on the new base. No worries.
It all went together fine. You need to try and get the adjusting brackets as far to nearside of the saw as possible otherwise you end up with my original issue which was where the saw blade was in contact with the blue silicone guide on the rail itself. I’m not convinced it’s quite right how I now have it, and would hope that in a factory model it would fit perfectly, but I got there by (a) redoing the screws that hold down the brackets and (b) being ok with nicking off the side of the blue silicone a bit. Not ideal but serviceable.
All in all, the parts cost me around £77 including shipping but having installed them have figured that you don’t need a full set at all. There is no need to keep a full old baseplate because it’s not something that is interchangeable due to that split pin from earlier. So that means 77, 82, 80, 83 and 84 can all be salvaged from your current base. Also, and this is crazy - you need 6x 93 - but they come in packs of 4. (I thus ended up with 24…) 85 and 76 are also reusable from your current base… so I suppose you’d get it down to around £60 for the full set.
Would I do it again? Well, obviously I’d just try and get the right machine in the first place! But it’s a toss-up. I can’t actually get the G model where I am (or at least, not for cheaper than the non-G + upgrades) so yes.
It’s 50/50 I think - if you could sell the non-G and then buy the G-model for about the same price then that’s obviously the way forward, but in the face of no other option, this is definitely doable and I do now have a saw that works on the rail.
YouTube video…!
I’ve somewhat pointlessly made a video of me building it.
Update (15/11/2020)
I spent some time using the saw yesterday to cut some kitchen worktop. It worked brilliantly.
Update (16/11/2020)
I’ve attached a screenshot which shows a parts list with the bits needed in green. You need 2x 93. You need 71 but not the arm (77+) since this can be recovered from yours. I *think* this is everything you need but it was a while ago… my notes above say 85 and 76 aren’t needed, but you could always cross-check this against yours to make sure.