Building a PiHole on a Raspberry Pi
Pi-Hole should need little by way of introduction. If you know what it is, happy days. If you don’t know what it is, then read on to find out why you need one.
In summary, it’s a hardware-based traffic blocker for a network.
In technical terms, it becomes a DNS proxy for your network - all your traffic flows through it, and it cleanses out a lot of the ads and other scummy shit that you don’t want to see.
I’ve been using one at home for at least 4-5 years. I’ve had to rebuild it a couple of times along the way but never documented it. I was running a reasonably old version of Raspberry Pi OS (formerly known as Raspbian, which is a Debian port) which had since become unsupported, and then my SD card crapped itself so it seemed like a good time to set it up again.
So for my own benefit, here’s how I set one up. There are a ton of guides out there, so I will likely keep it fairly brief.
TBH, the front page here says pretty much everything you need… but the docs go in to more detail; and there are one or two steps that always catch me out.
Oh, and despite its name, you don’t actually need to run it on a Raspberry Pi. It started life there, but has since grown to be supported on a bunch of other platforms, so a repurposed old PC running Ubuntu would be just fine.
Pre-requisites
This page tells you everything you need to know about where and what can run PiHole.
I’m on a Pi3, I think, with a 16gb SD card. I’m doing setup on macOS on the same network.
Go
Step 1: install
If you are setting it up on a Pi, get the Pi Imager software. That’s fairly self-explanatory. I choose the 32-bit Lite version (which is found in the ‘Other’ options) since I don’t want a desktop environment.

You can set some options here in the ‘Advanced’ properties, such as wifi, SSH etc… however I tend to not do this in preference to raspi-config. I’m not sure why.
Anyway, let it finish, then pop the card in your Pi and boot it up. I will always put the PiHole on an Ethernet connection (with static IP) as opposed to Wifi.
It will prompt you to set a new username and password. Login when it’s done.
Step 2: update it.
Yep, as predictable with most modern software there are probably some things to do get it up to date. Use
sudo apt-get update
and it will whir away. If it tells you anything needs updating (or you feel like living on the edge), use
sudo apt upgrade
to upgrade.
Step 3: use raspi-config
This will do the basic configuration (if you didn’t do this as part of the imaging process) - type
sudo raspi-config
which brings you to a nice GUI-ish interface. Do the following:
- System Options -> Hostname, and set a sensible hostname.
- Interface Options -> SSH and enable it. (This will allow you to access it over the network)
- Localisation Options -> WLAN country. (This will suppress some nags.)
- Advanced Options -> Expand Filesystem
then go to Finish, which will force a reboot.
Step 4: set a static IP
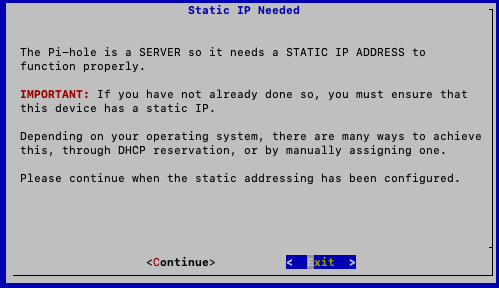
PiHole needs a static IP, and quite frankly it just makes life easier. Assuming the Pi is using dhcpcd as the network manager, then this can be achieved easily.
sudo nano /etc/dhcpcd.conf
which will open an editor with existing network settings configured. Towards the end of the file will be a section that has ‘Example static IP configuration’. The # stands for comment, so it means these lines are commented out.
Remove the leading # and then configure appropriately for your network. If your router is on 192.168.1.1, after it should look a bit like this…
# Example static IP configuration:
interface eth0
static ip_address=192.168.1.2/24
#static ip6_address=fd51:42f8:caae:d92e::ff/64
static routers=192.168.1.1
static domain_name_servers=192.168.1.1
#static domain_name_servers=192.168.0.1 8.8.8.8 fd51:42f8:caae:d92e::1
I’m not using IPv6 so I leave it commented out. I also set the DNS servers to just use the router.
Use CTRL + X to exit, yes to Save modified buffer, and use
sudo reboot
to restart it. If this has worked, then from your host machine (i.e., not the Pi) you should now be able to ping the Pi on the IP address you set. In macOS, I would open a terminal and type
ping 192.168.1.2
and you should get a response…
64 bytes from 192.168.1.2 icmp_seq=0 ttl=...
64 bytes from 192.168.1.2 icmp_seq=1 ttl=...
64 bytes from 192.168.1.2 icmp_seq=2 ttl=... etc.
Step 5: login over SSH
You should now be able to login to it remotely over SSH… which means you can do everything on your host machine now. So in a Terminal, type
ssh user@IPAddress
so if the user account you created for the machine was ‘pi’ with a static IP address of 192.168.1.2, you would use
ssh pi@192.168.1.2
You will get something similar to this:
The authenticity of host '192.168.1.2 (192.168.1.2)' can't be established.
ED25519 key fingerprint is SHA256:asdhfouidasghfusdghfuiosdguifgsduigfuisdgf
This key is not known by any other names
Are you sure you want to continue connecting (yes/no/[fingerprint])?
Type
yes
to accept it. Login with the Pi password, and you’re in… happy days.
Step 6: install PiHole
Install instructions are here which includes using Docker, which my good chum Marc blogged about recently.
I’m a simpleton, so I just use the easy method:
mkdir pihole
cd pihole
wget -O basic-install.sh https://install.pi-hole.net
sudo bash basic-install.sh
This kicks off the install process. You can enter through the whole lot and accept the defaults. You do want the Admin dashboard, because it’s super helpful (and interesting!)
Eventually it should spew out something like this
[i] Pi-hole blocking will be enabled
  [i] Enabling blocking
  [✓] Reloading DNS lists
  [✓] Pi-hole Enabled
  [i] Web Interface password: <someChars>
  [i] This can be changed using 'pihole -a -p'

  [i] View the web interface at http://pi.hole/admin or http://192.168.1.2/admin

  [i] You may now configure your devices to use the Pi-hole as their DNS server
  [i] Pi-hole DNS (IPv4): 192.168.1.2
  [i] Pi-hole DNS (IPv6): fd43:46e7:c259:487e:6814:cdf5:1d1c:d771
  [i] If you have not done so already, the above IP should be set to static.

  [i] The install log is located at: /etc/pihole/install.log
  [✓] Installation complete!
Step 7: change the PiHole web admin password
For fairly obvious reasons, possibly.
pihole -a -p
Step 8: profit
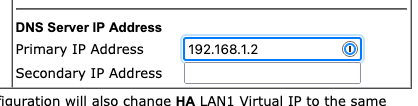
With the device setup, you now need to set your network to use it as its DNS server. This will vary based on your device. On my Draytek router, it’s done by going to LAN > General Setup > LAN n > DNS Server IP Address
Step 9: test
You may need to reconnect your device (or flush its DNS cache) for changes to take effect; but go to a heavy ad site and check for success.
Other tips
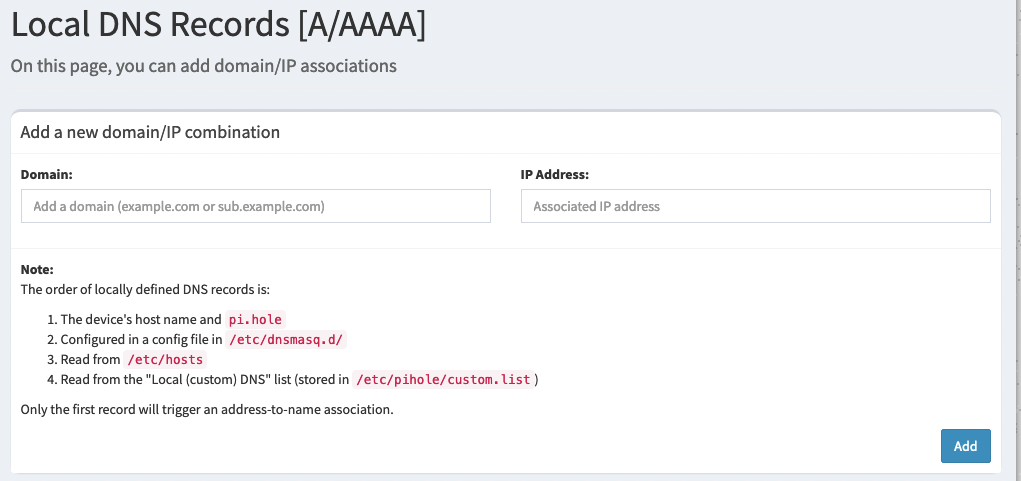
One great feature of the PiHole is that it can act as a local DNS server as well, i.e., if you have devices on your network that you want to hit my a hostname as opposed to IP, then you can set these up. You used to do this via a list on the device, but the web interface now has the option:
You can also use the Domain tools, to blacklist (or whitelist!) specific domains.
PiHole is regularly updated. The web admin will alert you if updates exist… as the version numbers will glow…
Updates are simple:
sudo pihole -up
Have a root through the rest of the web dashboard - there’s a lot of good functionality.
Done
Enjoy your new ad-free browsing experience. Don’t forget to donate to the project.