Tip: Visual Studio + Batch replace GUIDs
A common method for creating Visual Studio-based SharePoint solutions is to actually create them in the SharePoint GUI first, and then save the site as a template, and import that .wsp file in to Visual Studio as a SharePoint project. This often saves a lot of the hard slog of starting from scratch in Visual Studio, but still giving you the reusability of Visual Studio based solution.
One small issue you may run in to though is the (re-)use of GUIDs in e.g., Site Columns. For safety, you may like to replace the GUIDs, but in the case where you have a lot to replace, doing this by hand could be cumbersome. Step up Visual Studio Macros. You can create a simple Macro to automate virtually any process. The only problem, in this case, though, is that my testing of macro-ing the Find/Replace was that I could easily find GUIDs in a file, but replacing them with a freshly generated one wasn’t obvious. So I created a custom macro.
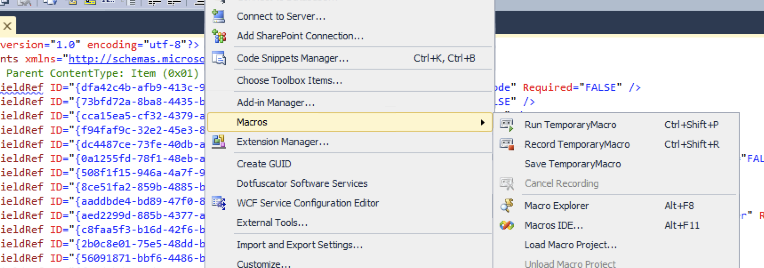
Open up the Macros IDE from Tools > Macros
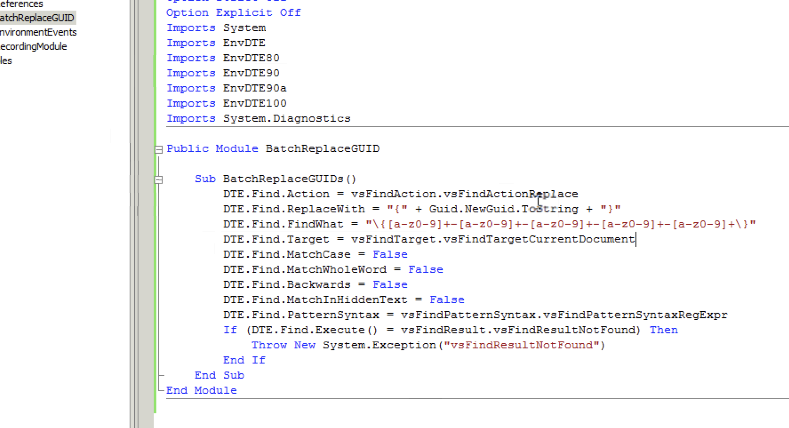
Create a new Macro, e.g., BatchReplaceGUID. Fill in the code below, which should end up looking like this. As you can see, it uses Regex to search for GUIDs, and then replaces them with the .NET creator. For SharePoint CTs, we need to wrap them in curly braces.
Save the file and close the editor. Open up the Macros Explorer, and in MyMacros should be your new Macro. Double click on BatchReplaceGUIDs and hey presto.

